

A step-by-step summary of how to create and manage an Invoice using Doplac CRM. Before that, start with following this video will help you more
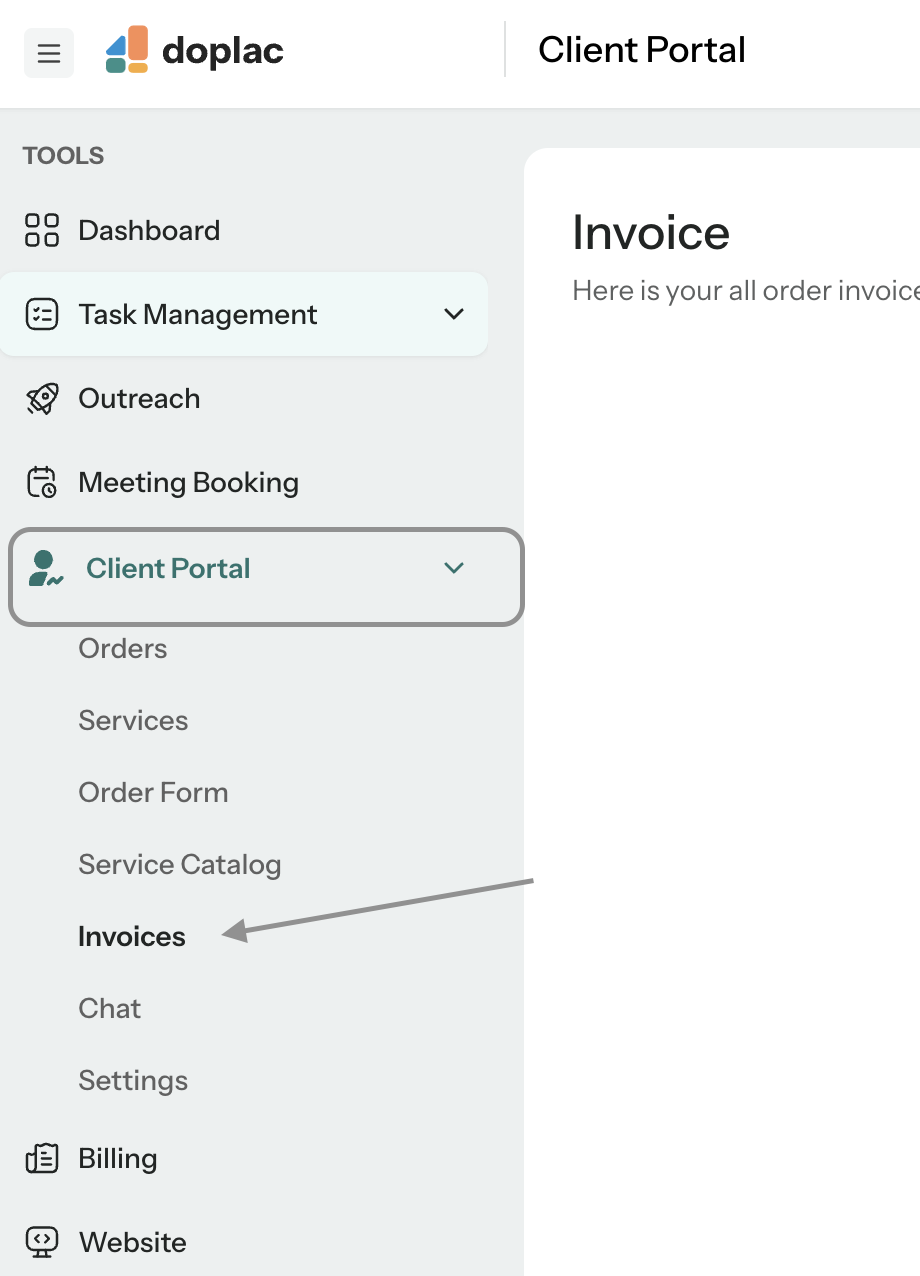
1. Access the Invoice Section:
- Log into Doplac CRM and click on the "Invoice" option under the client portal.
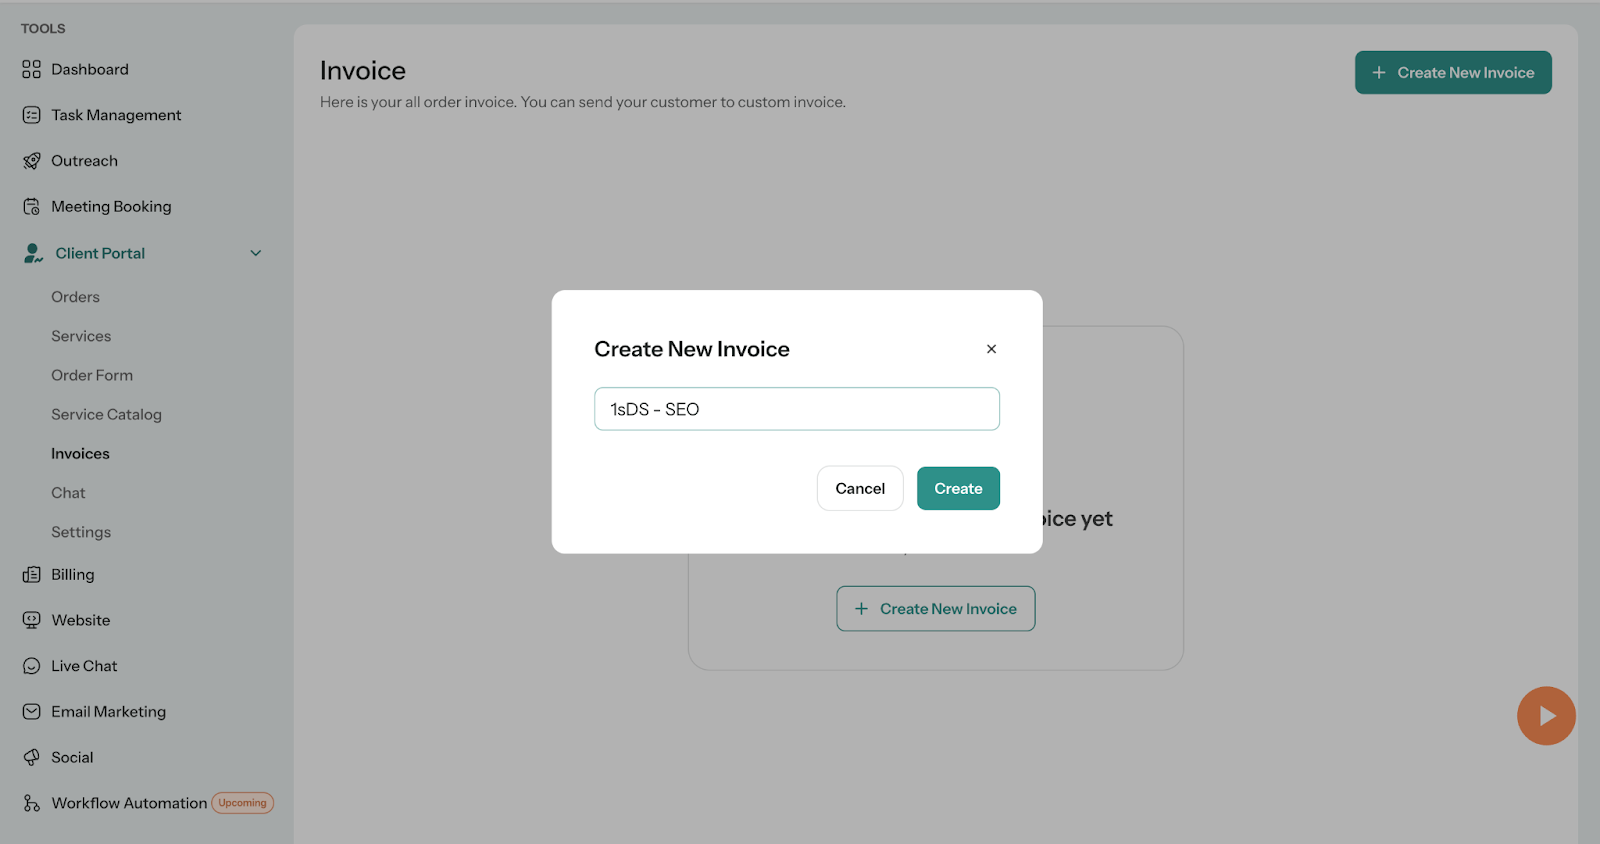
2. Create a New Invoice:
- Click on "Create New Invoice."
- Enter the invoice name.
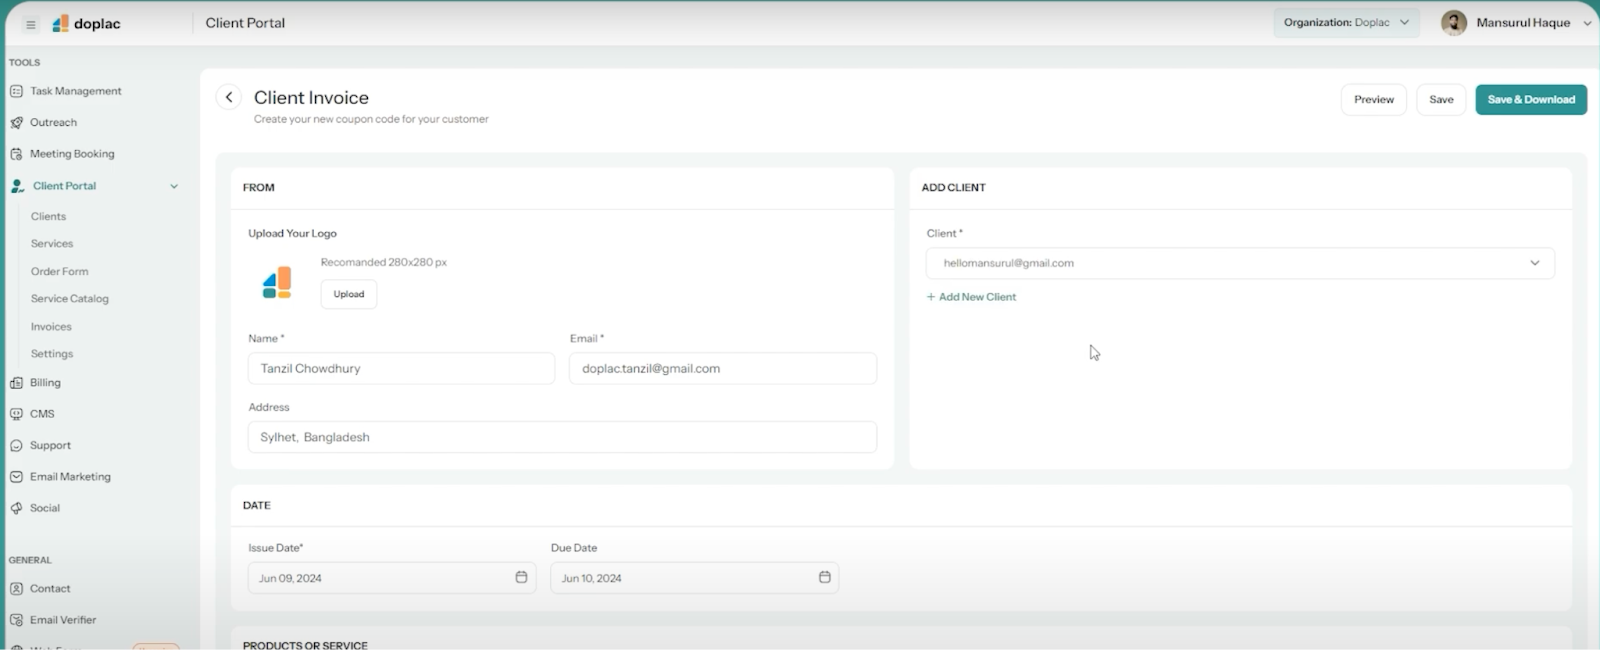
3. Select Company and Logo, Information, Date and beyond:
- Choose your company or select if you are a sole proprietor.
- Upload your company logo.
- Fill in your name and email address.
- Provide your address details.
- Choose the client’s email address. If the client is not onboarded, click on "Add New Client" to onboard them.
- Enter the issue date (e.g., 9th of June).
- Set the due date (e.g., 14th June).
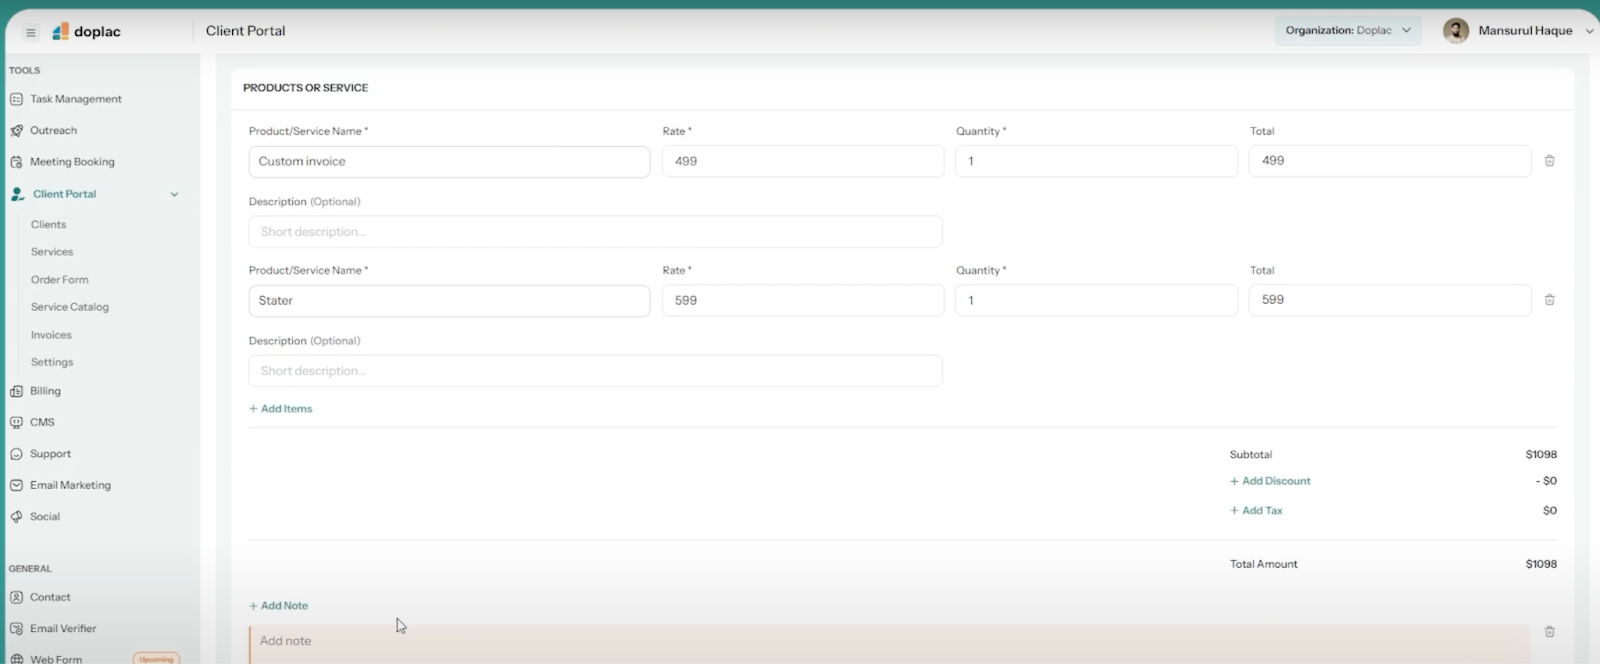
4. Choose Services, add description, add more item and calculate
- Select from existing services or create a custom service.
- Enter the invoice rate and quantity.
- Optionally, provide a description for the services or products.
- Click on "Add More Item" to include additional services.
- Review the total invoice value and make adjustments if necessary.
- Click on "Add Discount" to apply discounts based on percentage or flat rate.
- Optionally, add taxes based on percentage or flat rate.
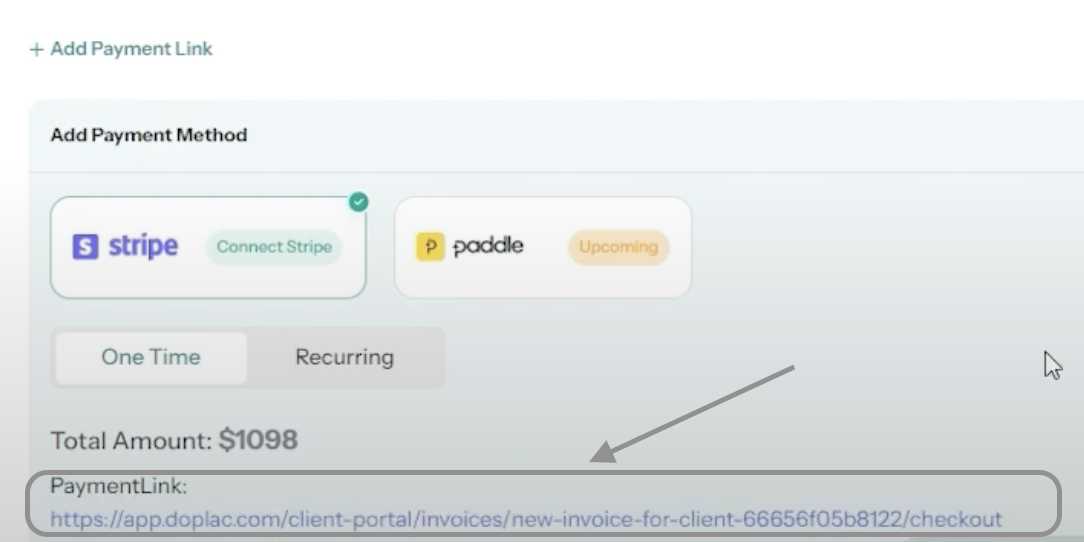
5. Add Payment Link & options:
- Ensure your payment method (e.g., Stripe) is connected.
- Click on "Add Payment Link."
- Decide if the invoice is a one-time payment or recurring.
- For recurring payments, set the recording time.
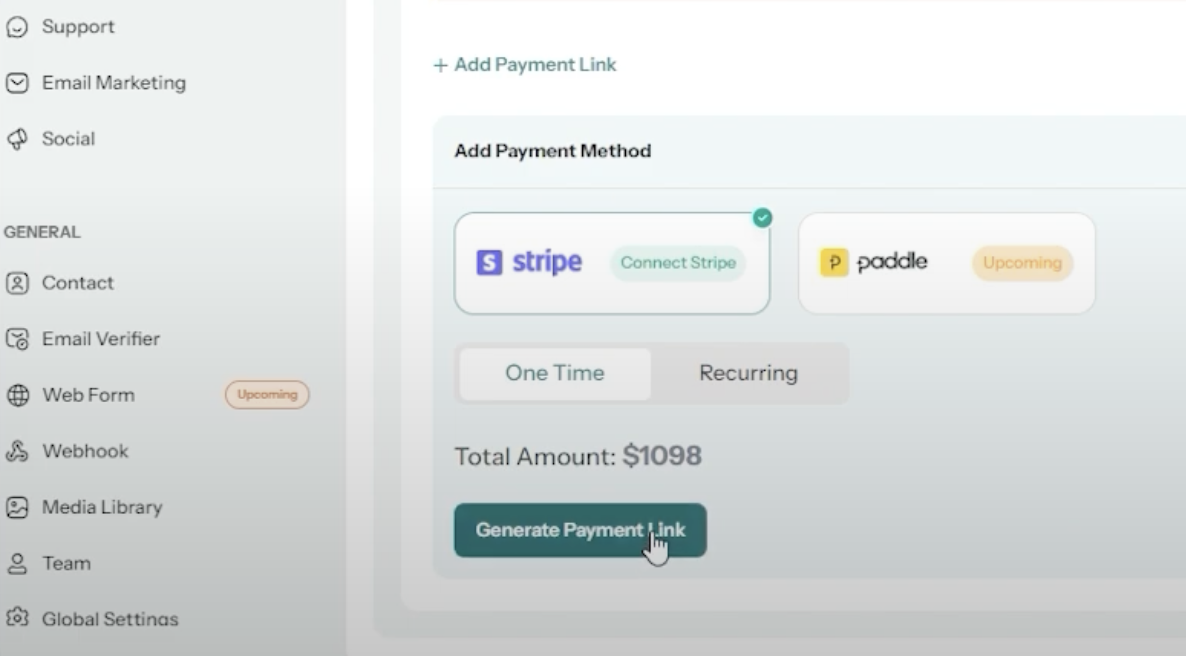
6. Generate Payment Link:
- Click on "Generate Payment Link" for one-time invoices.
7. Save and Download Invoice:
- Click on "Save and Download" to download the invoice.
- Alternatively, click on "Save" to keep it in the system.

8. Preview & Send Invoice:
- Check the invoice preview to ensure all details are correct.
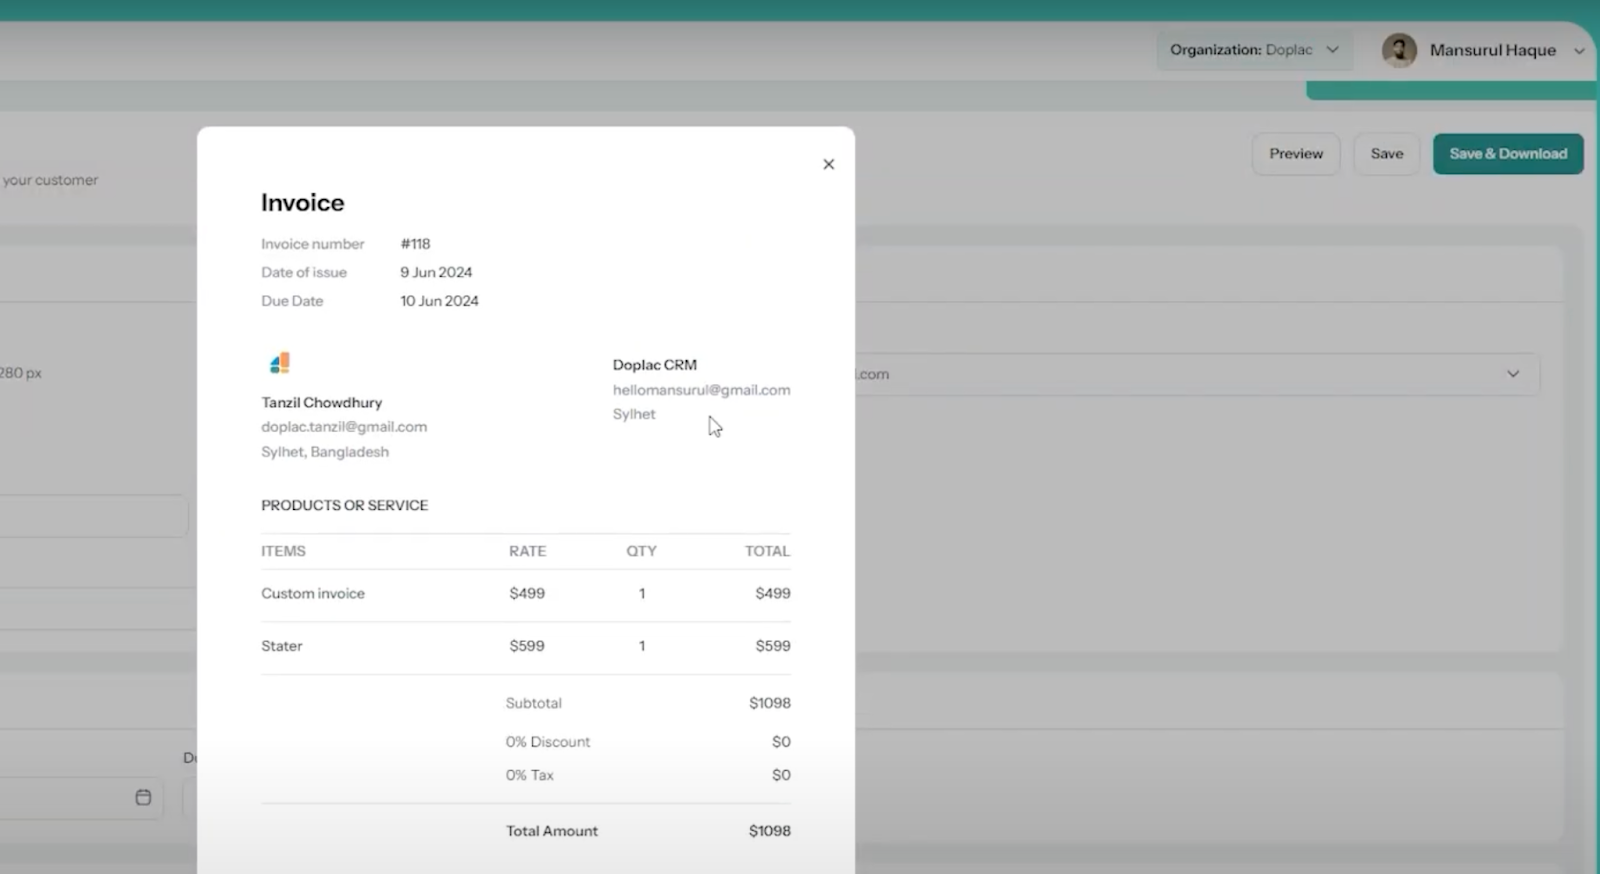
- Once satisfied, send the invoice to your client.
Note: This process allows for efficient invoice management tailored to the needs of digital agencies. To learn more, Watch the video shown at down right corner, or talk to support for further assistance.


