

How to Use Task Management Tool in Doplac CRM
Task management, a part of DOPLAC's CRM platform, allows you to keep track of projects and
individual tasks.
Let's review how DOPLAC's Task Management can help you manage a project or carry out tasks.
Step 1: Getting to know the Task Management Tool
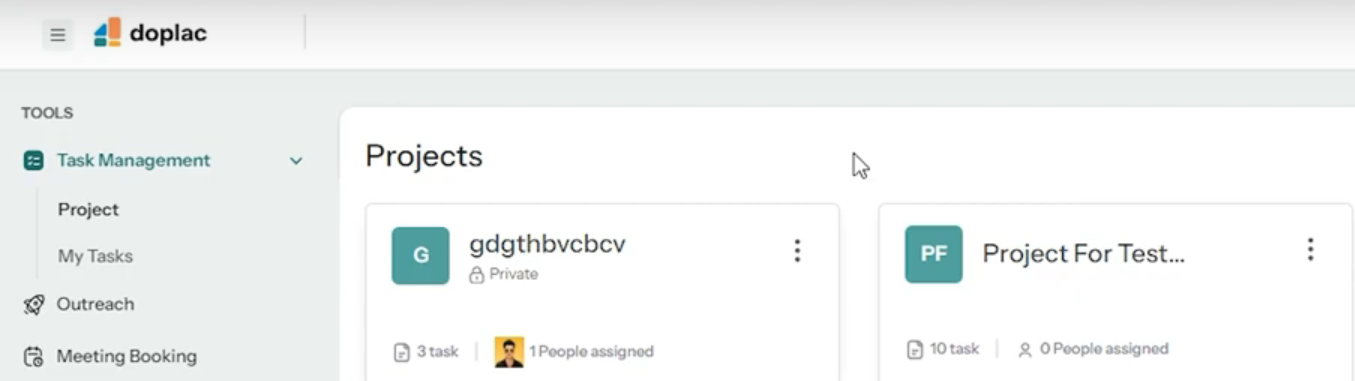
Sign in to your DOPLAC account using your login details. Once logged in, go to the main dashboard. Here, you'll find the Task Management section, which includes options for "Projects" and "Tasks."
Step 2: Creating a New Project
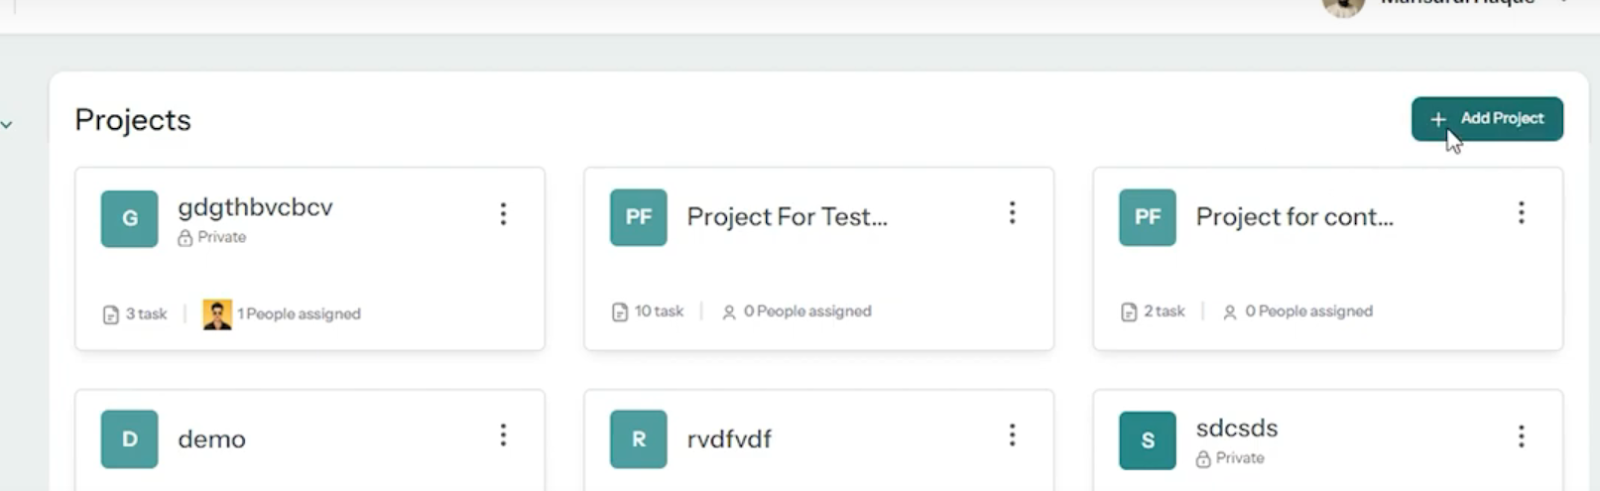
Within the Task Management section, click on the "Projects" tab. This is where all your existing projects are listed. Click the "New Project" button to start a new project. A form will appear, prompting you to enter essential details about your project.
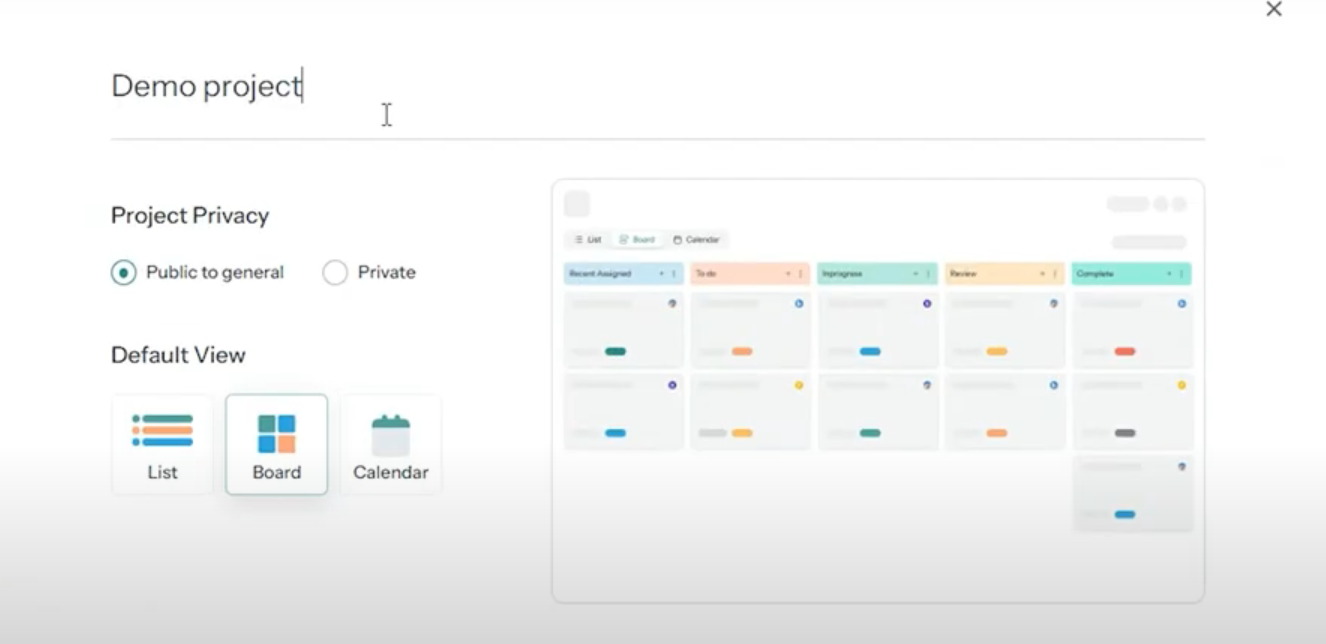
Project Name: Assign a clear and descriptive name to your project. Privacy Settings: Choose whether the project will be private (visible only to selected team members) or public (accessible to the entire team). View Options: Select the view that best suits your project—List, Board, or Calendar.
After setting up privacy and view options, click "Create Project" to finalize the setup. Your project is now ready for task assignment.
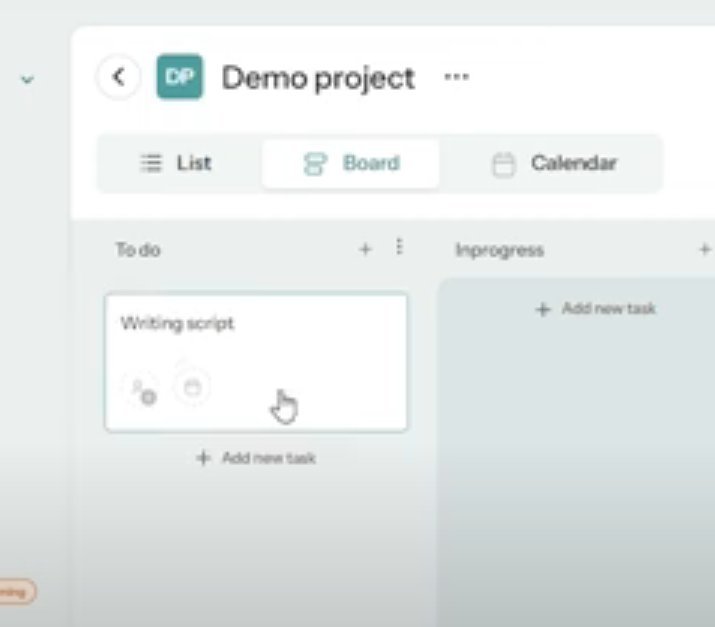
Step 3: Add Tasks to Your Project
Within your newly created project, locate and click the "Add Task" button. This will open a form where you can input the necessary details for each task.
Task Name: Enter a clear and concise task name.
Task Description: Provide detailed instructions or objectives for the task. It ensures that all team members know exactly what to do.
Step 4: Assignment of Tasks
After defining the task, you'll need to assign it to the appropriate team members and set up key details accordingly.
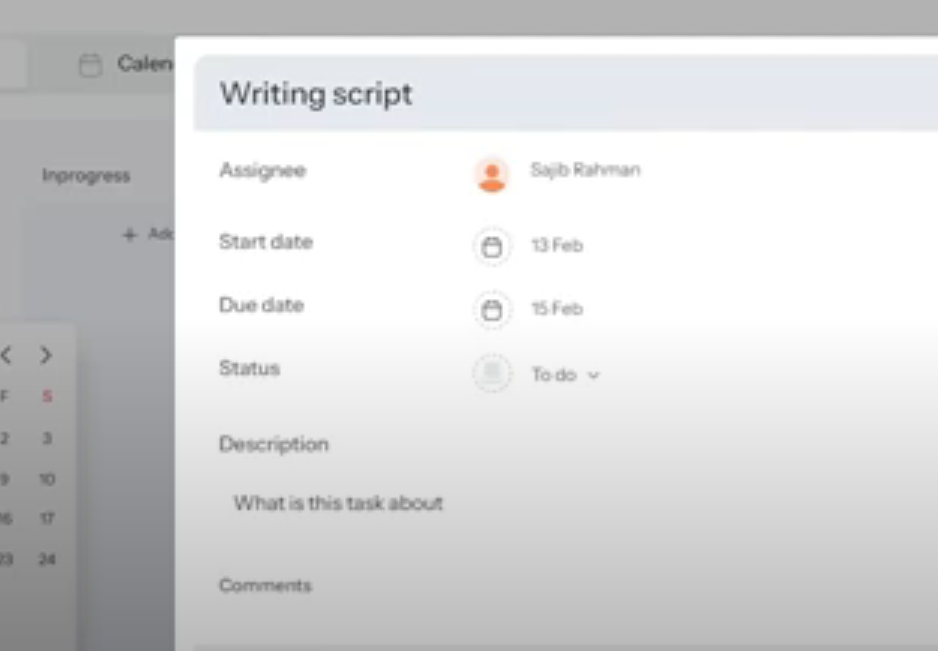
Assign Team Members: Select the team members responsible for completing the task. Set Start and End Dates: Define the task timeline by setting start and end dates. This helps track progress and ensure deadlines are met. Use the "Comments" Section: Add specific notes, instructions, or updates in the "Comments" section. Team members receive comments directly, and this section can also be used for ongoing communication.
Step 5: Managing and Tracking Tasks

You can view all tasks under their respective projects in the project dashboard. Collaboration Features:
Add People: If you need to involve more team members, click "Add People." Copy Link: Share the task or project link with others by clicking "Copy Link." Rename, Color Settings, Privacy, Delete: Customize your tasks by renaming them, adjusting color settings, modifying privacy options, or deleting functions as needed.
Using these steps, you can easily create projects and assign tasks, giving you more time and meeting deadlines.


